Kris Jordan

Kris Jordan

  • Mission
  • Students
  • Teaching
  • Thoughts

›Recent Posts

Recent Posts

  • OBS for On-line Teaching and Instructional Videos
  • New Website
  • Code Sketch - Paper Trail
  • Encryption with RSA Key Pairs
  • Log Indexing and Analysis with Logstash and Kibana

OBS for On-line Teaching and Instructional Videos

July 23, 2020

Kris Jordan

Open Broadcaster Software (OBS) is a free, open-source project for live streaming content to the web. It can also be used for producing and recording a presentation or as a virtual camera for web conferencing software such as zoom. I've had success using it for teaching this summer and wanted to record a demo video of what it can do while sharing a few tips for how I am using it.

The video above was recorded live with zero editing or post-processing work.

If you're prerecording videos that involve your webcam or switching back between something more conversational and screensharing a presentation, web browser, or text editor, then recording in OBS can dramatically cut your post-processing time.

Scenes

Before you record or stream you can design your scenes. Once multiple scenes are added, you can transition between scenes by selecting them from the scene pane user interface or from a hotkey. You can setup hotkeys in the File > Hotkey menu.

A scene is made up of many visual and audio sources. A scene's visual sources can be arranged, resized, rotated, and cropped via drag-and-drop. A scene's audio sources can be mixed to a desired volume level and muted individually.

Visual Sources

You can add a source to a scene via the sources pane or by right clicking on the scene preview. Drag-and-drop your visual sources to arrange them on a scene. You can resize visual sources by dragging them from corner handles. To crop a visual source, hold down the Control key while you drag a handle. The stacking, or z-ordering, of visual sources is controlled from the sources pane if you rearrange your sources.

Common sources include:

Webcam / Video Capture

Your webcam's video output, or if you have a video capture card and want to use a DSLR/camcorder, can be added as a source to any scene. This one is self-explanatory. If you have a solid color background, such as a green sheet, you can add a Chroma Key filter to the video source for transparency after some parameter tweaking. Color correction, brightness, and so on can also be tweaked via filters.

Display Capture

Share your entire desktop display as a visual source, just like a webcam. If you'd like to share only a specific area of your screen, crop the source using the method described above.

I've personally found sharing a specific rectangle of my screen more useful than sharing a specific window. That way I know I can move any window I want to share into the rectangle and it just works, rather than the Window Capture source described next.

Window Capture

The Window Capture source gives you the ability to share a specific application window, regardless of where the window is positioned on your screen. The entire window will be shared. Some applications (Google Chrome-based / Electron) need to be started in a specific way in order for this setting to work (with your graphical processing unit's acceleration disabled). I strongly prefer the Display Capture source described above and do not use Window Capture.

Color Source

Useful for adding a solid color background to a scene. After you add it, click the lock icon in the scene pane to avoid accidentally rearranging it as you arrange the other elements of your scene.

Audio Sources

Multiple audio sources can be mixed. For teaching purposes there are likely only two sources that matter: your microphone and your desktop's audio (when playing a video or audio/music clip). Each scene only needs to have the audio sources you plan to use in it.

Audio source volumes are mixed independently and can have filters applied.

The Noise Filter useful for cleaning up microphone input. I haven't found a use for the other audio filters, but when I've attempted to tinker with them I've found that searching for "obs (insert filter name) settings" produces useful results.

Teaching Specific Tips

My Scene Collection

I move between six different scenes in the course of a live lecture:

  1. Camera Only - Maximixing the webcam and hiding all other content so that the focus is on a one-to-one conversation.

  2. Big Camera Overlay - 70% of the scene is my shared display, the other 30% is my webcam feed shifted off to the side, but large.

  3. Small Camera Overlay - 95% of the scene is my shared display, my webcam is moved into the bottom right corner of th screen.

  4. Screen Only - 100% of the scene is the shared display.

  5. Muted Screen Only - No sound while sharing the display. Useful when students are carrying out active learning exercises.

  6. Zoom/Poll Overlay - Same as Big Camera Overlay but an additional display source is added which shares a zoom interviewee or a live poll's results.

You can install a plugin for OBS to work as a webcam source so that it can be used as your camera in Zoom or Microsoft Teams. The plugin is called VirtualCam and is available on Windows and Mac (I have not tried the Mac version and it looks like it may require some suboptimal security settings).

Relative Camera/Screen Sharing Placement

If you are using a webcam that is not built into your laptop's screen, try placing it off to the left side of your screen. When you use your screen as an input source, choose a bounding rectangle off to the right side of your screen. Then, if you compose scenes where your avatar is on the right-hand side of the screen it will present as if your avatar looking in the general direction as the content in your video.

Advanced Features

OBS has far more advanced features than those discussed here. I haven't needed them. If you browse professional livestreams on Twitch.com, you'll see there are lots of interesting things you can add as sources. If you want to explore the more advanced features my recommendation is searching around and following a tutorial or instructional video. When I've wondered how something I saw on a stream was possible I was able to find the answer in at most a few searches.

Parting Thoughts

OBS is powerful software for producing and either recording or streaming video content live. It has increased the production quality of my teaching content while reducing the amount of time I spend on any editing in post-processing. It has a learning curve and takes time to configure to your liking and get comfortable navigating, but will be worth it if you're doing any video editing after the fact to achieve similar results.

New Website

March 5, 2019

Kris Jordan

I've had my head down for the past few years focusing every ounce of my energy on teaching. I was told I should do a better job of sharing the work my teaching team and I have done since we started Fall of 2015. For bootstrapping purposes and motivation I'm changing over to this site with the minimal amount of content coverage and will add more in iterations.

Some essays I wrote before teaching still provide useful content to visitors via search engines. The topics are scattered, but represent some of the things I used to spend more time thinking about. For historical purposes, they're indexed here:

  • 2014-01-02 - Code Sketch - Paper Trail
  • 2013-12-02 - Encrypting with RSA Key Pairs
  • 2013-11-15 - Log Indexing and Analysis with Logstash and Kibana
  • 2013-11-10 - PourBot - Hacking the Kettle
  • 2013-11-04 - Timesaving crontab Tips
  • 2013-11-02 - Setting up Push-to-Deploy with git
  • 2013-10-29 - PourBot - Making an Arduino Pour Over Robot
  • 2013-10-28 - Letters to an Aspiring Programmer
  • 2012-11-08 - The Inverted Pyramid & other Tips on Making Demos
  • 2011-12-15 - multimethod.js - Clojure-like Multimethods in JavaScript
  • 2011-03-10 - Fixing WebKit's Accept Header
  • 2011-03-06 - Refactoring JS Caching using Memoize
  • 2008-12-02 - Towards RESTful PHP - 5 Basic Tips
  • 2008-11-27 - Dynamic Properties in PHP and StdClass
  • 2008-10-08 - Building a RESTful PHP Framework (Recess)
  • 2008-09-12 - Persona-Driven Development
  • 2008-09-07 - 10 Minute Mock Prototyping in Powerpoint

Code Sketch - Paper Trail

January 2, 2014

Kris Jordan

Often I'll have an idea that's interesting to me. I'll obsess for a weekend, sketch out some proof-of-concept code, prove to myself it'd be possible (with a lot of work), or not, and move along.

Sometimes these sketchy ideas are recurring. "Paper Trail" is one of them; it first surfaced circa 2009.

Rather than sketching ideas in private, I thought it'd be interesting to do publicly. Ridicule away.

This idea's motivation is a thought experiment:

What if you could trace every value in a program all the way back to its source at runtime?

This isn't a novel idea. Spreadsheets have been doing this forever, right? For example, assign 1 to cell A1 and =A1+1 to cell B2. The output value of cell B2 will be 2, but you can later trace its source back to A1.

It is a foreign idea, though, in general purpose programming languages. For example, assign a = 1, then assign b = a + 1. The value of b is now 2, but there's no way to know, at runtime, its source is a.

Why is this interesting?

Imagine a database-driven website's execution flow. The source of data is now the database, rather than hard coded values. Let's wave our hands with pseudo-code:

# Fetch a blog post
post = Post.first()
# Render template with blog post
render(template, post)
# Print title of blog post in template
<h1>{{ post.title | toUpperCase }}</h1>

The rendered output would be:

<h1>HELLO, WORLD.</h1>

Now imagine a "paper trail" of back references was baked in by default through that program listing. The template engine could just as easily also render (if it wanted to, for content editors):

<h1 class="papertrail-value"
    data-papertrail-href="/posts/1" 
    data-papertrail-property="title"
    >HELLO, WORLD.</h1>

Sprinkle in some JavaScript magic and voilà, front-end content editing becomes possible without the trade-offs it traditionally imposes on front-end developers:

  • no constraints on template structure
  • no additional work and effort
  • no new DOM tags
  • no ugly widgets forced in

Interesting follow-on questions and problems fall out quickly:

  • What would it take to implement this in user land?
  • What about sources that are collections rather than objects?
  • What about values that combine multiple source values, like string concatenations?
  • How much overhead would this impose? Would it actually matter?
  • Is there value in storing the whole trail or just the source(s)?
  • Is there any value if the source is read-only?
  • What other applications would a reference trail have?
  • How much work would a proof-of-concept take?

I'm going to keep sketching on this, at least through the weekend, and worst case when it resurfaces for me again in a few years.

Encryption with RSA Key Pairs

December 2, 2013

Kris Jordan

During the Thanksgiving holiday I wondered, "how hard would it be to encrypt and decrypt files with my SSH key?" Encryption is the purpose of public/private RSA key pairs, after all.

With openssl, it's not too hard. The following tutorial assumes you've setup RSA private/public keys for ssh/git/github/etc.

(Note: If you're on OSX, you should install the latest versions of OpenSSL and OpenSSH with Homebrew.)

First, let's start with our plaintext file:

echo "Hello, world." > plain.txt

Before we can encrypt the plaintext with our public key, we must export our public key into a PEM format suitable for OpenSSL's consumption.

openssl rsa -in ~/.ssh/id_rsa -pubout \
  > ~/.ssh/id_rsa.pub.pem
 
cat ~/.ssh/id_rsa.pub.pem

It should look something like this:

-----BEGIN PUBLIC KEY-----
MIIBIDANBgkqhkiG9w0BAQEFAAOCAQ0AMIIBCAKCAQEAkq1lZYUOJH2Yeq5IG/TfB3vFbRcc6fSxrwuADNuS10ftI9Nd5lsVKiU+T/NkDQ42I8DMVyjrrFS/bfBUoH1DeyhDVMXvCyfRYNtQdhq0zKMs7l1bmmeBoTiXEyOnjst0LTNzdjY6huvWilACCiU+DeRUvZr73VZty/YoAZsHA4GdnTqyLHnusN/k0r6KaTagUxZl26Wkj2J2sIw+3XIMczmPHO0p4bpynEKmKF3tr7bqBPe6s8azQMElibCAA8jTUs45RvHYtdKajmTxfETIQa8a54ZzZ54dApo0yFXOb2LRgk8H5awk5dUNfcX88FoYDWD/RigJEd3F5Y1unaZXJwIBIw==
-----END PUBLIC KEY-----

Encrypt

cat plain.txt \
 | openssl rsautl \
     -encrypt \
     -pubin -inkey ~/.ssh/id_rsa.pub.pem \
 > cipher.txt

The important command in the pipeline is openssl. The first argument passed to openssl is the OpenSSL command you are running. It has a wide variety of commands covering a wide range of cryptographic functionality. For our purposes, we're doing public/private RSA encryption, so we're using the RSA Utility, or rsautl, command. Next, the -encrypt key indicates we are encrypting from plaintext to cipher text, and finally the -pubin flag indicates we are loading a public key from -inkey [public key file].

Print the contents of the ciphertext with cat cipher.txt. You should see fully encrypted gibberish.

Decrypt

cat cipher.txt \
  | openssl rsautl \
      -decrypt \
      -inkey ~/.ssh/id_rsa

"Hello, world."

Boom! We're back to plaintext.

If you actually wanted to trade encrypted messages, PGP is the much "friendlier" and accepted system for doing so. This manual, command-line method of encryption is a neat demo nonetheless.

Log Indexing and Analysis with Logstash and Kibana

November 15, 2013

Kris Jordan

I was back on HiFi today after one of our servers went through a minor panic attack.

Memory pressure led to swapping, swapping lead to thrashing, and thrashing led to the dark side where the ready queue was briefly in excess of the number of the machine's cores by a factor of 10. The interruption was brief, but it lead to thinking about low hanging fruit, bottlenecks, and ops.

I've been thinking a lot about twelve-factor app development and deployment lately. The "Twelve-Factors" are a set of principles put together by Adam Wiggins of Heroku fame. Following the methodology takes some additional thought and effort upfront, but has a lot of upside once you're operational. One of the factors concerns logging:

Most significantly, the stream can be sent to a log indexing and analysis system such as Splunk, or a general-purpose data warehousing system such as Hadoop/Hive. These systems allow for great power and flexibility for introspecting an app’s behavior over time, including:

  • Finding specific events in the past.
  • Large-scale graphing of trends (such as requests per minute).
  • Active alerting according to user-defined heuristics (such as an alert when the quantity of errors per minute exceeds a certain threshold).

I've been meticulous about the maintenance and archival of HiFi's data logs. We have used them in retrospectives and the occasional in-depth analysis, but have stopped short of putting together a system for harvesting and inspecting the data interactively. Today's incident was motivation to set one up.

The triumvirate of Logstash, Kibana, and elasticsearch came up in a recent Hacker News thread sounded encouraging. Logstash is a flexible event log streamer that makes it simple to extract data from logs and get it into elasticsearch for indexing and analysis (it can do a lot of other neat things, too). Kibana is a beautiful web interface for creating interactive dashboards for your data in elastic search. It's an all HTML5 application running entirely in the browser using elasticsearch's rest API. It's easy to make good looking dashboards:

kibana dash

Getting kibana, logstash, and elasticsearch running only took an afternoon to install and configure after running through logstash's Getting Started Guides. I'll need to come back for some additional work (like purging data) after it's fully proven itself. My initial impression: it's great collection of software.

Ignoring the per-server JVM bloat required by logstash, the whole setup seems too good to be true. Especially for open source software. It's simple to get logstash configured and kibana/elastic search are impressive (and fun!) to work with interactively. Diving in to specific events, isolating classes of events (like 500 errors), and composing dashboards to quickly answer your key questions is powerful.

Warehousing, visualizing, and diving into log data has never been easier. Now I just want to log more.

PourBot - Hacking the Kettle

November 10, 2013

Kris Jordan

I'm attempting to build an Arduino-powered coffee machine named PourBot.

In the previous post, I decided on an electric kettle to heat the water to the ideal coffee brewing temperature ~195F. I cracked the Kettle's base station open and found two boards inside. One was connected to the heating element with thick, scary wires, the other had buttons, the temperature LED, and a microcontroller. They were connected by 5 wires:

breakout board

To MacGyver this kettle for PourBot, I needed control over the heating element and the ability to read the water's temperature.

I had five unknown wires and a multimeter. Time to reverse engineer the wires' purposes!

If electronics are also new to you, this is how it feels to open an electronic device, plug it into the wall, and press buttons while trying to discover what the wires do:

hurt locker

Reality looks more like this:

mcgruber

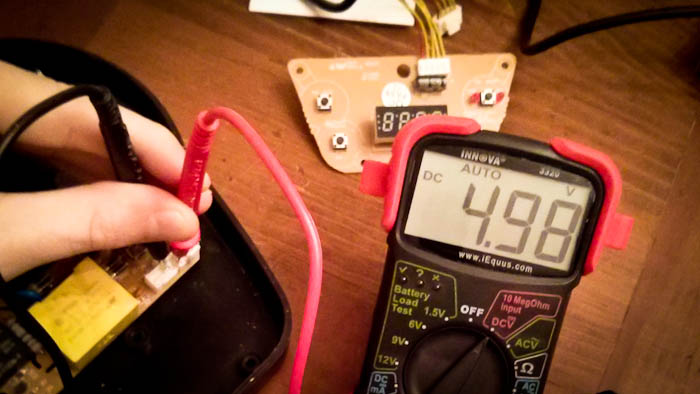
First discovery: the kettle's control electronics are regulated to 5V, which is what the Arduino operates with (and is pretty standard)! This means no extra work to communicate with the kettle, I can jump wires straight to the Arduino.

wire debugging

The Kettle's base has three states: without Kettle, idle, and on.

Without the Kettle, the LED does not display its temperature, so I started measuring the voltages over the wires in this state. From yellow-to-red, they were:

  1. 5V
  2. 0
  3. 0
  4. 2.5V
  5. 0 (Red)

I was off to a good start, finding the positive/anode wire #1. I was unsure of negative/cathode, somewhat expecting it to be the red wire #5, but it could also be wires #2 or #3. The 2.5v wire #4 was a mystery (and still is, tweet me @KrisJordan if you know the purpose it serves).

Next, I transitioned to the idle state by placing the kettle, with some room temperature water in it, on the base. Here were the voltages of the wires:

  1. 5V
  2. 0
  3. 0.37V
  4. 2.5V
  5. 0 (Red)

Ah ha! With the kettle on the base, wire #3 had a voltage. Given its fractional value, this must be the temperature sensor. If so, it should increase as the water heats up.

"Here we go," I winced while pressing the Boil button of the high-wattage electric kettle. Once I heard the heating element doing work, I took another reading of the wires while in the On state:

  1. 5V
  2. 0
  3. 0.84V
  4. 2.5V
  5. 5V (Red)

With the device on, the negative/ground/anode wire turned out to be #2. The red wire, #5, was a full 5V and clearly the wire controlling the relay to the heating element. Finally, an increasing voltage on the thermal sensor wire #3 confirmed it was rising with the temperature of the water.

Now we have a pin layout!

  1. Positive
  2. Negative (Ground)
  3. Thermal Sensor Output
  4. 2.5V(?)
  5. Power Relay Input (0 off, 5V on)

Mission accomplished: we can read the thermal sensor and control the heating element.

Next, I need to reverse engineer the output from the thermal sensor to know how to convert its voltage reading into degrees fahrenheit. Remember, 195°F is the target temperature for brewing coffee!

Timesaving crontab Tips

November 4, 2013

Kris Jordan

Setting up a crontab for running scripts on a schedule can be frustrating to debug. Usually, it boils down to cron's environment being different than your user's (i.e. PATH issues).

Always Setup crontab "Variables"

Your crontab file is not a shell script, but it has a few special variables that you can setup the same way you would a shell script. Set these special variables up in every crontab file you work with. Future you will thank you for it.

MAILTO="a@b.com,b@b.com"

When your cron jobs have output, or, more importantly, when they fail, cron will send the output e-mail these addresses.

PATH="/usr/bin:/sbin:/bin"

Logged in to the user account whose crontab you're setting up, go ahead and echo $PATH and copy those contents into the PATH variable of your crontab. Remember, this isn't a real script file, so you can't implicitly append :$PATH.

After assigning PATH and MAILTO, setting up your crontab is much easier.

HOME="/path/to/app/root"

The HOME variable tells which directory cron should execute the crontab commands from. Often times you'll have a user/crontab per project. If so, set the HOME variable to your project's root directory to avoid long, absolute paths to scripts or from having to 'cd /path/to/app/root && ...' for each job.

SHELL="/bin/bash"

Set the default shell to execute your commands from with the SHELL command. Like PATH, a safe bet is making this the same as your user's shell. Logged in as that user, run echo $0 to get an absolute path to your shell.

Still Stumped? Dump Your Environment

It's easy to redirect cron's environment variables to a temporary file, as seen on Stack Overflow. Tweak the following to run from your crontab in the near future:

30 08 * * * env > /tmp/cronenv

Once it runs, cat /tmp/cronenv to see your crontab's environment variables. Alternatively, if you're getting cron error messages e-mailed to you after setting up MAILBOX above, look at the raw headers of the e-mail. E-mails from cron should set X-CRON-ENV headers with these environment variables, too.

Happy automating!

Setting up Push-to-Deploy with git

November 2, 2013

Kris Jordan

I first set up a push-to-deploy system with git and puppet for a side project a few years back. It worked so well I transitioned my company's development process onto it for all of our new projects starting last year. It offers the simplicity of the "push-to-deploy" model Heroku pioneered, with full control and flexibility over the operating system environment.

I've started thinking about my next iteration of this system for Didsum, and using pushing for more than just deployment purposes. The Push-to-_______ pattern is powerful and easy to use, once you know how the pieces fit together. In this post, I'll walk through the setting up Push-to-Deploy from the ground up.

(I'm assuming a working knowledge of: terminal, git, and a scripting language.)

Preparing our Repositories

Let's keep things straightforward by placing our development git repository, remote git repository, and deploy directory under the same local directory.

$ mkdir push-to-deploy
$ cd push-to-deploy
$ mkdir {development,remote,deploy}

Awesome, now let's setup the remote git repository. With a real project, this would be a directory on your production server. There is a special setup for git repositories whose purpose is to receive pushes from developers, they're called "bare" repositories. You can read more about "bare" repositories, but for our purposes their purpose is just to receive pushes.

$ cd remote
$ git init --bare
$ cd ..

Perfect, now let's setup our development directory with git. (You could also copy one of your git project's contents into the development folder.)

$ cd development
$ git init
$ echo "Hello, world." >file.txt
$ git add file.txt
$ git commit -m 'First commit.'

We now have a development repository with its first commit. Our last preparation step is to register the "remote" repository. If you're fuzzy on git remotes, the official git site has you covered.

$ git remote add production ../remote
$ git push production master

Boom. You've just pushed your commit from development to your bare, 'remote' repository. We're ready to setup push-to-deploy.

Set up Push-to-Deploy

Now that our remote repository is setup, we're ready to write a script for what it'll do when it receives a push. Let's navigate to the hooks folder of our remote repository. Hooks are scripts that git runs when certain events happen.

$ cd ../remote/hooks
$ touch post-receive
$ chmod +x post-receive

The hook we care about for push-to-deploy is post-receive. It is run after receiving and accepting a push of commits. In the commands above, we're creating the post-receive script file with touch, and making sure it's an executable file.

Next, open the post-receive script in your preferred text editor. Copy the contents below:

#!/usr/bin/env ruby
# post-receive

# 1. Read STDIN (Format: "from_commit to_commit branch_name")
from, to, branch = ARGF.read.split " "

# 2. Only deploy if master branch was pushed
if (branch =~ /master$/) == nil
    puts "Received branch #{branch}, not deploying."
    exit
end

# 3. Copy files to deploy directory
deploy_to_dir = File.expand_path('../deploy')
`GIT_WORK_TREE="#{deploy_to_dir}" git checkout -f master`
puts "DEPLOY: master(#{to}) copied to '#{deploy_to_dir}'"

# 4.TODO: Deployment Tasks
# i.e.: Run Puppet Apply, Restart Daemons, etc

Let's walk through each of the steps:

  1. When git runs post-receive, the data about what was received is provided to the script via STDIN. It contains three arguments separated by spaces: the previous HEAD commit ID, the new HEAD commit ID, and the name of the branch being pushed to. We're reading these values and assigning them to from, to, and branch variables, respectively.

  2. Our purpose here is to automate push-to-deploy. Assuming a workflow that keeps production on the master branch, we want to exit this script prior to deploying if the branch being pushed is not master.

  3. The first deploy step is to "checkout", basically export or copy, files from the master branch to the directory where our project is deployed to in production. (Remember, in this demo it's the fake "deploy" directory, in the real world this might be /var/www, or wherever your project expects to be in production.)

  4. Now that our deploy directory is up-to-date, we can run whatever deployment tasks we need to run. This could be applying Puppet scripts (I'll write a post on this scenario soon), restarting a web or application server, clearing cache files, recompiling static assets, etc. Whatever steps you'd normally need to do manually after updating your project's files, automate them here!

Save your post-receive hook, and let's test it out!

Testing with Pushing

We can test our script manually, by creating a new commit in our development directory and pushing:

$ cd ../../development
$ echo "New line." >> file.txt
$ git add file.txt
$ git commit -m 'Testing push-to-deploy'
$ git push production master

In the output of the git push command, you should see lines starting with "remote:". These lines are the output of our post-receive script:

Already on 'master'
DEPLOY: master($TO_ID) copied to 'push-to-deploy/deploy'

The first line is noisy output from the git checkout command in step 3, we can ignore it. The second line, is from the puts command, also from step 3 in our post-receive script.

The directory we're deploying to should now be populated and up-to-date:

$ ls ../deploy
$ diff file.txt ../deploy/file.txt

Pretty awesome, right?

Testing without Pushing

When you're working on a post-receive hook, it's annoying to muck up your project's commit history and push each time you make a change. Luckily, because it's just a script, we can fake it from the command-line.

$ cd ../remote
$ git log -2 --format=oneline --reverse

First, we need to get the IDs of our most recent 2 commits. The git log command, above, will give us these two IDs in the order you'll want to replace the $FROM_ID and $TO_ID variables with, respectively.

$ echo "$FROM_ID $TO_ID master" | ./hooks/post-receive

This method makes setting up your post-receive hooks enjoyable, enabling you to quickly iterate on your script and execute it repeatedly.

Next Steps

In this post, we've walked through how to setup the push-to-deploy with git. For a real world project, your 'remote' and 'deploy' folders would usually be setup on a server, not locally. The details of doing that and properly configuring SSH is beyond the post of this scope (note to self: I should write on SSH configuration, too!).

From here, it's up to your project to determine what actions to automate! Happy pushing!

PourBot - Making* an Arduino Pour Over Robot

October 29, 2013

Kris Jordan

(* Read: Attempting to make.)

Earlier this month, probably after seeing some neat post on Hacker News, I bought an Arduino Starter Kit on a whim. My mission: to hack up a pour over coffee machine (or fail trying).

Why? Well, partly because I love coffee. Especially a good cup made via pour over.

The truth, though, is that I've always been secretly jealous of the kids who broke open electronics and hacked them to do neat things. I've been firmly anchored in software1 since since a middle school buddy gave me a bootleg copy of Visual Basic 6. (Writing code was love at first sight, even despite the ugliness of VB6.) For me, Arduino offers an approachable way to tinker with electronics and hardware, while still having code as a crutch.

For the sake of reference, here's the Arduino Uno board that comes with the kit:

arduino board

First: What is Pour Over Coffee?

It's a simple, old method of brewing coffee that is making a revival at boutique (hipster) coffee shops. The pour over method produces a single cup of coffee brewed deliciously fresh.

pour over

Here's roughly how pour over coffee works, step by step:

  1. Water is boiled to 192°F-200°F. This is important. (Most drip machines fail to breach 180°F.)
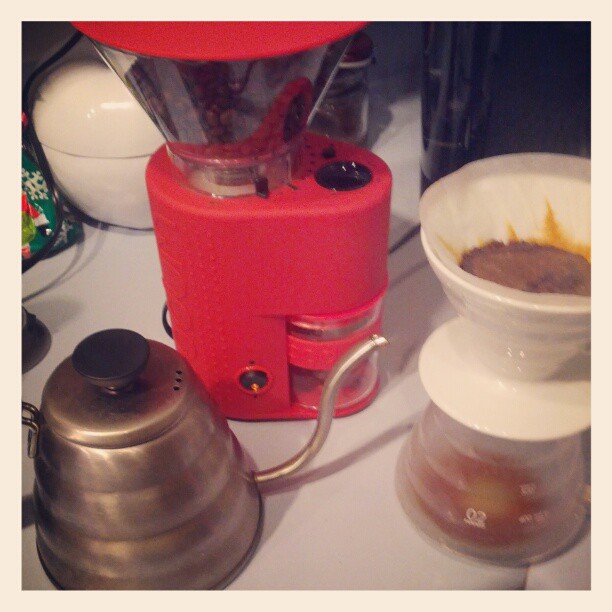
  2. Coffee is measured and ground fresh, with a burr grinder.
  3. The filter is placed in the dripper (the white ceramic funnel).
  4. The grounds go in the filter and are preheated by pouring just enough water to soak. Wait 30 seconds.
  5. Using a gooseneck kettle, water is poured onto the grounds with a growing spiral starting from center. Add more water as necessary. It should take around 2 minutes to brew.

That's it! So, let's see how much of this process can be automated with little electrical knowledge, an Arduino, and some hacking.

Problem #1) Sourcing a Boiler

Boiling water to right around 195°F, is step one, so it's the first problem I needed to tackle. Aubrey and I have collected a number of coffee machines over the years. My plan: salvage parts from the most promising of them.

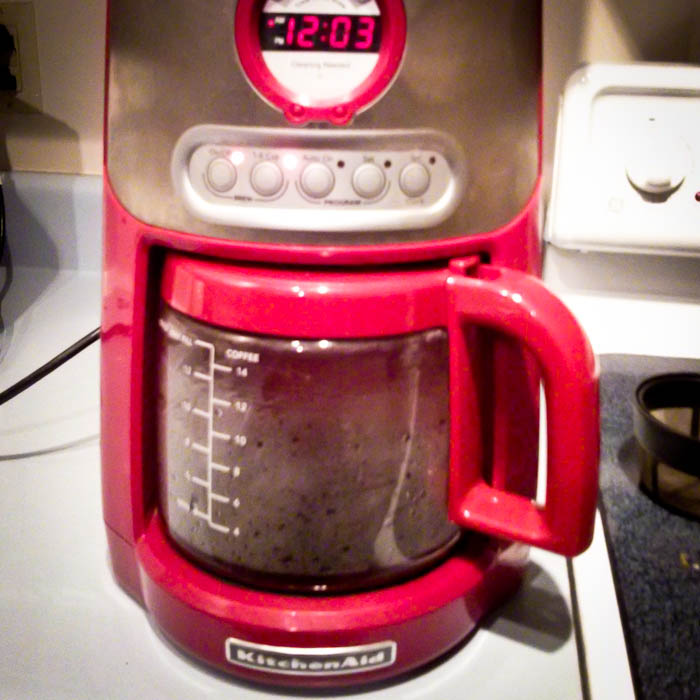
coffee machine kitchenaid

I pulled our first coffee machine from the attic, a nice looking, red KitchenAid and set it up. I filled its tank, and set it to brew, without any coffee, to test its water temperature.

coffee machine kitchenaid

It started pumping water into the grounds filter almost immediately, with lukewarm water. Gross. The hottest reading I could get it to reach was 160°F. No wonder this machine made coffee that tasted like wet garbage. The good news is, I wouldn't need to clean the filth left in it from the abuse it endured at NMC's office back in the 605 building days.

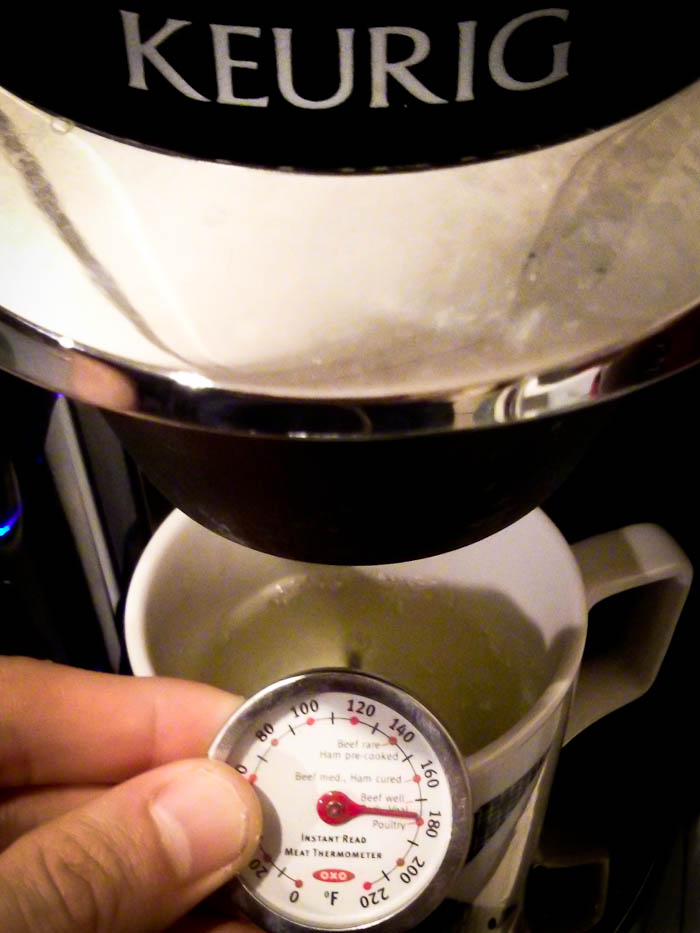
keurig

Next up: the Keurig. I had seen an Arduino Keurig hack before, and it had a nice looking pump system I thought would also be handy. Unfortunately, the warmest reading from the Keurig I could get was 180°F. It wasn't a completely fair test, I couldn't read directly from the spout without the machine refusing to pump water, but this isn't science, it's hacking.

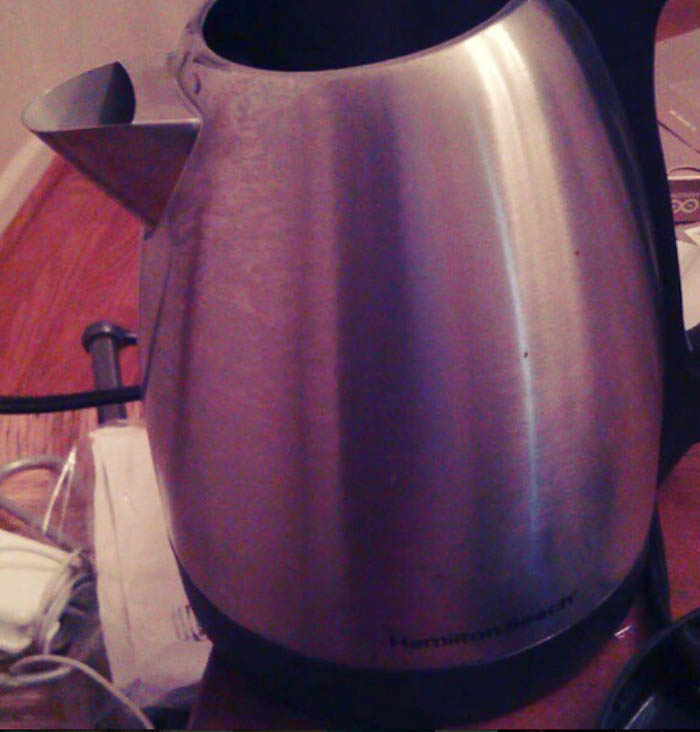
hamilton beach

For some reason, I had mentally blocked out our Hamilton Beach electric kettle as a possible solution. I guess because it lacked pumps. It could certainly get water to boiling, though.

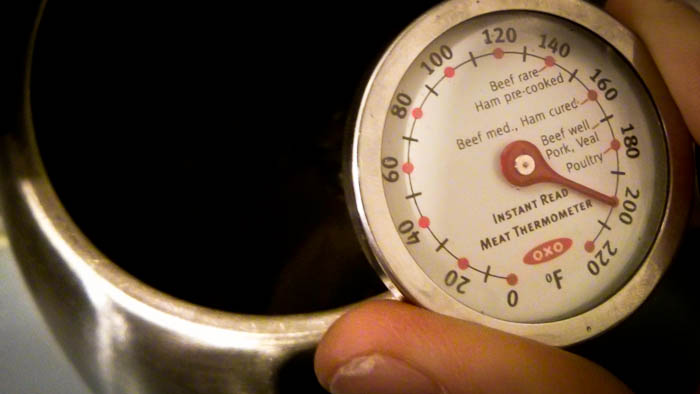
hamilton beach

200°F! Yes!

hamilton beach thermometer reading

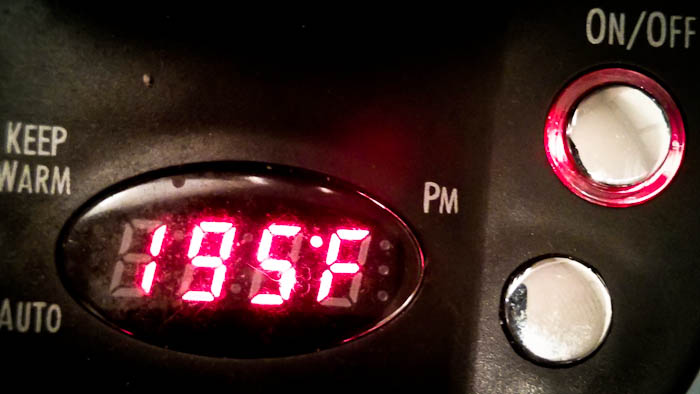
The other cool thing about it, I had forgotten: it has a built-in temperature display. I actually bought it for this feature. Most electric kettles lack this.

New Theory: If I can read the temperature sensor and control turning on/off the heating element, I've got everything I need to boil water to 195°F!

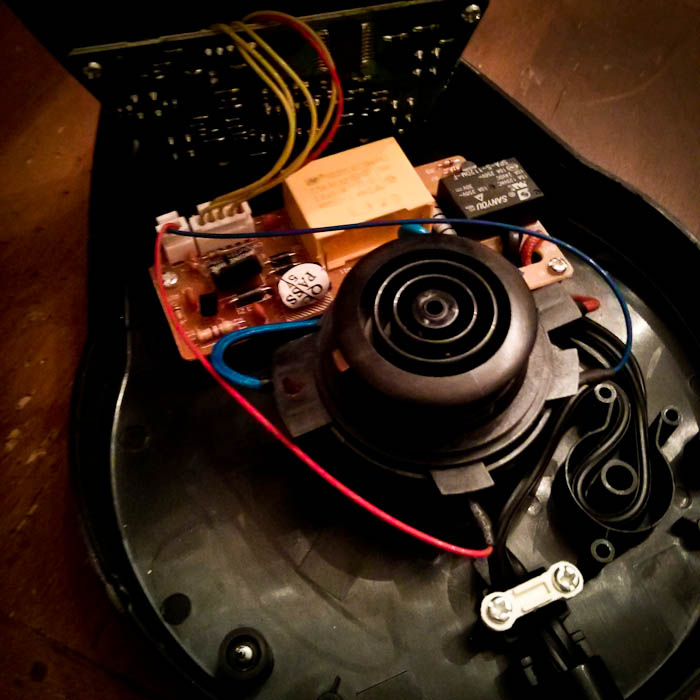
So I opened up the Kettle's "Docking Station". This was annoying because of the cockamamie Tri-Wing(C) screws they used, I assume, to prevent people like me from from opening it up. "Ah, screw it," I said, forcing a Phillips Head with some pressure to get the bolts out (and strip the heck out of them).

hamilton beach insides

Boom! We're in!

board

I spent some time looking at the two boards. (Ok, an embarrassingly long time. I'm coming into this project extremely green with electronics.) My conclusion was, "this is really encouraging".

I tried tracing the circuit on the backside of the breakout board to figure out the purpose of the wires, but realized I was slowly getting nowhere. So I stopped and ordered a cheap multimeter to be able to read the voltages of the wires while it was in operation. I had my fingers crossed the breakout board would be operating within the 0-5V range the Arduino does. That'd be great.

Being physically "blocked", because you're missing a tool or a part you can't get today, is a big change from equivalently simple software learning. The upside: it forces you to stop and go to bed.

In the next post, I reverse engineer the Kettle's jumper wires' purposes.

Letters to an Aspiring Programmer - On Loops

October 28, 2013

Kris Jordan

A good friend is learning how to program. I'm naturally psyched. He's tracking the topic and amount of time he's investing into learning how to code with Codecademy on Didsum, which makes it easy for me to follow along with progress. I thought it might be fun, and potentially helpful, to write some quick commentary around the topics he's learning and post them here. Today's notes are about Looping.


Patrick,

Nice work getting through the section on looping today! Being "a bit shaky with them" is nothing to worry about. The details about loops are hard to remember, especially from tutorials that force feed you details too early.

Covering the full power of loops in a single tutorial is kind of like trying to teach someone new to baseball all of the grips and releases a pitcher could use. Until you need to throw a curve ball, knowing exactly where to hold your fingers around the stitching and how to release it isn't a big deal.

Once you're writing a program to do something you need it to do, you'll probably hit points where you think "I need to do something a bunch of times" or "I have a bunch of data, I need to do something with every piece of it." When you find yourself thinking that, loops are a powerful tool at your disposal1.

Once you have a need, and can jot down a basic outline of your strategy for solving it (in English), you can search Google for "types of loops" to decide which kind of loop to use or its specific syntax. Test and tweak until you get it right.

Common Purposes of Loops

After you've used loops for a while, some patterns will start to emerge in how you use them to help you with a particular kinds of tasks. These tasks are not worth trying to commit to memory, but they're common enough that being aware of them should be useful. All of these examples will use for loops over arrays.

Do something for each element

var numbers = [1, 2, 3, 4, 5];
// For each number in the `numbers` array:
// log it to console
for(var i = 0; i < numbers.length; i++) {
  console.log(numbers[i]);
}

This was the opening demo of your Codecademy tutorial. It loops through each number in the numbers array and takes an action with it. In this example, the action is to print it to console. The action could have been alert(numbers[i]); to get it to show an alert dialog for each number. There will be times when you just need to take an action with every element in an array and this simple pattern will have you covered.

"Change" elements of an array

var numbers = [1, 2, 3, 4, 5];
var numbers_doubled = [];
// For each number in numbers:
// double it and add it to the numbers_doubled array
for(var i = 0; i < numbers.length; i++) {
  numbers_doubled.push(numbers[i] * 2);
}

In this demo, our goal is to double an array of numbers. The doubling isn't important, what is important is that after we're done we have a new array whose elements are "mapped" from the elements of the original array. In this case, that mapping is to double the element. Maybe your array is made up of investments and you want apply interest on each of them.

Note: We could have changed the elements of original numbers array in place, without using the separate numbers_doubled array, and that would have been fine. One upside of creating a new array is that we still have a way to access our original data later in the program. Another upside is that this program will be easier to debug.

Filter elements of an array

var numbers = [1, 2, 3, 4, 5];
var odds = [];
// For each number in numbers:
// if it is odd, add it to the odds array
for(var i = 0; i < numbers.length; i++) {
  if(numbers[i] % 2 == 1) { 
    odds.push(numbers[i]);
  } 
}

In this demo, our goal is to pick out all of the odd numbers in the numbers array and place them in the odds array.

Note: If you haven't seen the % modulo syntax before, it's basically "integer division remainder", i.e. if you divide 3/2 you get a remainder of 1.

When you have a dataset, but only want to focus on a particular chunk of it, you can filter out exactly the data you want using a loop to populate a new, filtered dataset. Creating a new variable to copy the elements you do want into a new array is usually simpler than removing the items you don't want.

Summarize elements of an array

var numbers = [1, 2, 3, 4, 5];
var sum = 0;
// For each number in numbers:
// add it to the sum variable
for(var i = 0; i < numbers.length; i++) {
  sum = sum + numbers[i];
}

In this example, we're adding up all the numbers. We could have done other things, too, like averaged the numbers. The important takeaway is that we initialized a new variable, sum, to hold the results of our computation. Once we've looped through the array, and reduced it down to a single value, we now have their sum.

For a lot of common mathematical summaries (like sum, product, average, stddev, etc.) there will be libraries you can use so you do not have to write these computations by hand. When you find yourself wanting to summarize in your own special way, this is a useful pattern to come back to.

Conclusion

Don't worry about the details of loops until you find yourself needing to do something repeatedly. The important thing to know is that they exist. If you can frame your problem as one or more of the different common types of loops I demoed above: taking repeated actions, modifying a bunch of values, filtering out values, or summarizing values, then you can use those patterns as building blocks.

Once you're more comfortable with functions in JavaScript, it'll be fun to revisit these looping concepts with the full power of functions at your command. Once you've got functions down we could write some that allow you to avoid the hassle of writing loops altogether. Let's save that glory for a rainy day.

Best,

Kris

Next →
Kris Jordan
Kris Jordan
MissionStudentsTeachingThoughts
Connect
YouTubeTwitterInstagramLinkedInGitHub
Copyright © 2022 Kris Jordan